Secure Your Smart Devices: How To Use SSH Remote IoT For Easy Access
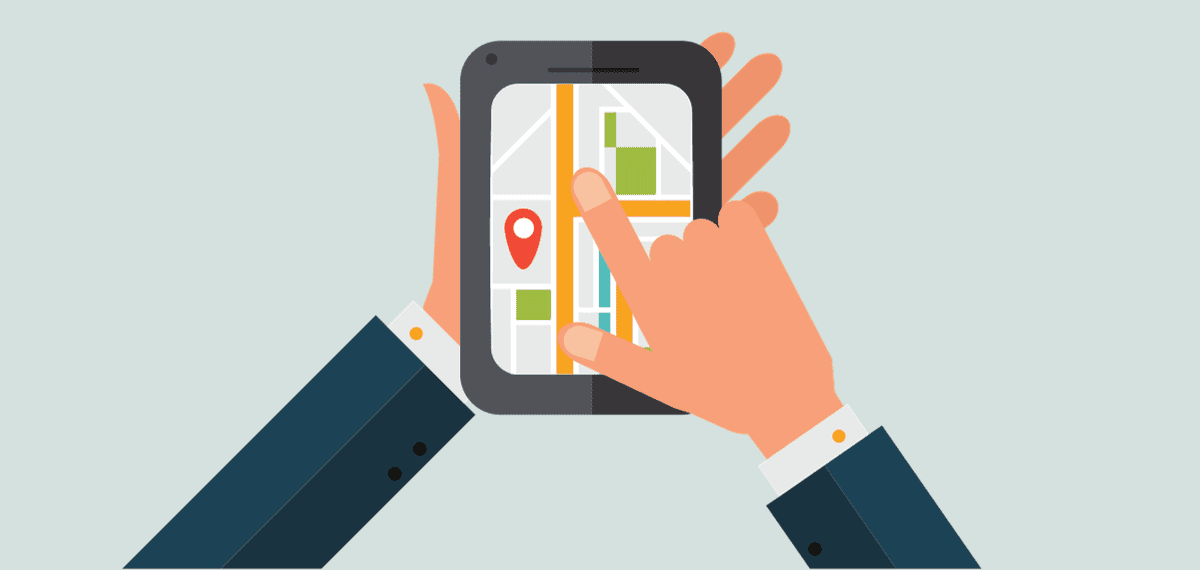
Managing your smart gadgets and little connected devices from afar can feel a bit like trying to talk to them through a thick wall. You know they are there, working away, but getting direct control, or even just checking in, often seems like a big task. This is where a very helpful tool called SSH comes into play, offering a way to truly connect with your Internet of Things (IoT) items, even when you are miles away. It gives you direct access, letting you put your devices into action for their intended purposes, a bit like having a direct line to their brains.
When we talk about how to use SSH remote IoT, we're really discussing how to make your small internet-connected devices, like a smart thermostat or a home security camera, listen to your commands from any location. This method, called Secure Shell (SSH), lets you employ your devices for specific tasks, giving you the ability to manage them as if you were right next to them. It's a way to put your skills to a particular purpose, making your IoT setup work for you, very simply.
This guide will walk you through the practical steps needed to use SSH with your IoT gadgets. We will go over what SSH actually is, why it's a great choice for keeping your remote connections private, and how to get everything set up for smooth communication. You will learn the commands to connect, and crucially, how to keep your remote access safe and sound, so you can truly utilize the means at hand for your smart home or project, and that, is that.
- Riley Green Political Party
- As The World Caves In Song Meaning
- Timothy Olyphant A Multifaceted Talent In Hollywood
- Richard Hoffman Police
- Sowte Ifsa
Table of Contents
- What is SSH and Why It's Great for IoT?
- Getting Your IoT Device Ready for SSH
- Connecting Remotely: The SSH Process
- Keeping Your IoT Connections Safe
- Common Questions and Help with SSH IoT
What is SSH and Why It's Great for IoT?
SSH, which stands for Secure Shell, is a network method that allows you to connect to a remote computer securely. Think of it as a very private, encrypted tunnel between your personal computer and your IoT device, like a Raspberry Pi or a smart sensor. It lets you put your device to work for a particular purpose, such as checking sensor readings or restarting a service, even when you're not physically near it. This secure connection is what makes it so useful for managing devices that are, say, in another room, or even another country, you know.
The core idea behind SSH is to provide a safe way to do things with your devices remotely. It protects your information from prying eyes, making sure that whatever you send or receive is kept secret. This is incredibly important for IoT, where devices might be handling sensitive data or controlling important systems. You are basically employing this method for a specific, beneficial purpose, which is to manage your gadgets without worry, pretty much.
For IoT, SSH is a fantastic choice because many small devices, like single-board computers, often run Linux-based operating systems that come with SSH built right in. This means you don't need a lot of extra software or complex setups. It's a straightforward way to put your device into service for remote control. You can, for instance, use it to send commands to a smart light, or to pull data from a weather station, actually.
Getting Your IoT Device Ready for SSH
Before you can start using SSH to manage your IoT gadgets, you need to make sure your device is ready to accept connections. This usually involves a few simple steps, and it's less complicated than it might seem, as a matter of fact. The goal is to prepare your device so it can properly put SSH into action for remote access.
Things You Will Need
To get started, you will need a few basic items. First, you'll need your IoT device itself, obviously, like a Raspberry Pi, an ESP32, or another microcontroller capable of running an operating system that supports SSH. You'll also need a way to connect to your device initially, perhaps a keyboard and screen, or a direct USB connection, just to get things going. A stable internet connection for both your computer and your IoT device is also quite important, you know.
Your computer, the one you'll be using to connect from, should have an SSH client installed. If you use Linux or macOS, it's usually already there. For Windows, you might need to install something like PuTTY, or use the built-in OpenSSH client in newer versions of Windows, basically. This client is the tool you'll use to make the connection, to put the remote access into service.
Setting Up SSH on Your IoT Device
The process for enabling SSH varies a little depending on your specific IoT device. For popular devices like the Raspberry Pi, it's usually very simple. Often, you can enable SSH directly from the operating system's settings or by creating a special file on the boot partition of the SD card before you even start the device, you know. This tells the device to begin using SSH for connections.
For example, with a Raspberry Pi running Raspberry Pi OS, you can open a terminal and type `sudo raspi-config`. Inside this setup tool, you can go to "Interface Options" and then select "SSH" to turn it on. It's a quick way to get your device ready to accept remote commands, making it possible to employ it for various purposes from a distance, so.
Once you've enabled SSH, your device is now prepared to listen for incoming secure connections. It's like you've given it a special ear for remote instructions. This step is about making sure the device is ready to put the SSH service into action, allowing you to use it for remote management, pretty much.
Finding Your Device's Address
To connect to your IoT device, you need to know its network address, usually its IP address. This is like its unique street number on your home network. You can often find this by logging into your Wi-Fi router's settings and looking at the list of connected devices, or by running a command on your IoT device itself, like `hostname -I` in a Linux terminal, apparently.
Knowing the IP address lets your computer know exactly where to send the SSH connection request. Without it, your computer wouldn't know which device to talk to. This address is what allows you to target your commands to the correct device, ensuring you can use it for its intended remote purpose, and stuff.
Connecting Remotely: The SSH Process
With your IoT device ready, the next step is to actually make the connection from your computer. This is where you put the SSH client into service, using it to establish that secure tunnel. It's a straightforward process once you know the basic command, and it gives you direct control over your remote gadget, you know.
Using the SSH Command
The basic SSH command is quite simple. You'll open a terminal or command prompt on your computer and type something like `ssh username@ip_address`. Replace `username` with the user account on your IoT device (often `pi` for Raspberry Pi), and `ip_address` with the IP address you found earlier. For example, `ssh pi@192.168.1.100`, basically.
When you first connect, your computer might ask you to confirm the connection, and then it will ask for the password for that user account on your IoT device. Once you enter the correct password, you'll be logged in, and you'll see a command prompt for your IoT device. You can then use it to accomplish tasks, just as if you were sitting right in front of it, so.
This command is the key to putting your remote device into action. It allows you to send commands, run scripts, or even just check the status of your device. It's the primary way you'll use SSH to manage your IoT setup, making sure everything is running as it should be, you know.
Making Connections with SSH Keys
For better security and convenience, many people use SSH keys instead of passwords. SSH keys come in pairs: a public key that you put on your IoT device, and a private key that stays on your computer. When you try to connect, your computer uses the private key to prove its identity to the IoT device, which checks it against the public key, actually.
To set this up, you first generate the key pair on your computer. Then, you copy the public key to your IoT device's `~/.ssh/authorized_keys` file. Once this is done, you can connect without needing to type a password every time, which is much faster and more secure. It's a more advanced way to employ SSH for its purpose, making remote access smoother and safer, apparently.
Using SSH keys helps to make sure that only your specific computer can connect to your IoT device, greatly reducing the risk of unauthorized access. It's a very good practice for anyone who wants to seriously use SSH for remote management, ensuring that your devices are put to work securely, always.
What About Ports and Firewalls?
SSH typically uses port 22. Think of ports as specific doors on your device that services use to communicate. Your computer sends the SSH request to port 22 on your IoT device. For most home networks, this works fine internally, you know.
If you want to access your IoT device from outside your home network (e.g., from work or a coffee shop), you'll likely need to set up "port forwarding" on your home router. This tells your router to send incoming SSH requests from the internet to your specific IoT device on your home network. This step lets you put your device into service from anywhere, but it needs careful setup to remain safe, so.
Firewalls, both on your IoT device and your router, might block SSH connections. You might need to adjust their settings to allow traffic on port 22. It's important to understand that opening ports can introduce security risks if not done correctly. You are basically making a path for remote access, and it's vital to make sure that path is secure, always.
Keeping Your IoT Connections Safe
Using SSH for remote IoT access is great for control, but keeping those connections secure is paramount. The meaning of "use" here extends to using it responsibly and safely. You want to employ SSH for its purpose of remote management without creating new risks, you know. Here are some simple yet effective ways to do that.
Strong Passwords and Key Access
If you're using passwords for SSH, make sure they are long, complex, and unique. Avoid simple words or common phrases. A strong password makes it much harder for someone to guess their way into your device. Better yet, as mentioned, use SSH keys and disable password-based login entirely. This is a much more secure way to put your device into service for remote access, as a matter of fact.
With SSH keys, your private key acts like a very special, uncopyable key to your device. Keep your private key safe on your computer and never share it. This method ensures that only your authorized computer can make the connection, which is a very good way to use SSH for security, obviously.
Changing the Default Port
As mentioned, SSH usually uses port 22. Many automated attacks scan for devices listening on this default port. Changing your SSH port to a different, non-standard number (e.g., 2222 or 22000) can make your device less visible to these automated scans. It's not foolproof security, but it's an easy step to reduce unwanted attention, you know.
When you change the port, remember to specify it in your SSH command, like `ssh -p 2222 username@ip_address`. This tells your computer to try a different door when trying to connect. It's a simple adjustment that can add a layer of privacy to how you employ SSH for your remote devices, pretty much.
Keeping Software Up to Date
Regularly updating the operating system and software on your IoT device is extremely important. Software updates often include security fixes that patch known weaknesses. If you don't update, you might be leaving your device open to attacks that exploit old flaws, you know.
Make it a habit to check for and install updates on your IoT devices. This ensures that the tools and systems you use for remote access, including SSH, are as secure as they can be. It's a continuous process of making sure your devices are fit for purpose and safe to use, always.
For more detailed information on securing your IoT devices, you might want to look at resources from reputable cybersecurity organizations. For example, the National Institute of Standards and Technology (NIST) provides guidelines on IoT security that can be very helpful. It's good to learn more about IoT security best practices from reliable sources.
Common Questions and Help with SSH IoT
People often have questions when they start to use SSH for their IoT devices. Here are some common ones, and some simple answers to help you along, you know.
Is SSH safe for IoT?
Yes, SSH is considered a very safe way to connect to your IoT devices remotely, provided you use it correctly. It encrypts all the communication between your computer and the device, which means no one can easily snoop on what you are doing. The safety really comes from how you set it up: using strong passwords or, even better, SSH keys, and keeping your software updated. If you use something, you do something with it for a particular purpose, and with SSH, that purpose includes security, so.
What do I need to use SSH with my IoT device?
You'll need a few things: your IoT device itself (like a Raspberry Pi), an SSH client on your computer (built-in on Linux/macOS, or PuTTY for Windows), and a network connection for both. You also need to know the IP address of your IoT device and have SSH enabled on the device. It's about having the right tools and knowing how to put them to work for your specific task, pretty much.
Can I control my IoT device with SSH from anywhere?
Yes, you can. To control your IoT device with SSH from anywhere outside your home network, you will need to set up port forwarding on your home router. This directs external SSH requests to your specific IoT device. It's like telling your home network to open a specific door for your remote connection. This allows you to employ your device for management purposes no matter where you are, making it very convenient, actually.
Connecting to your IoT devices through SSH offers a powerful way to manage them securely and effectively, letting you put them into service from anywhere. By following these steps and keeping security in mind, you can take full control of your smart home or project devices. This approach helps you truly utilize your gadgets for their intended purposes, ensuring they work as designed. Learn more about remote access solutions on our site, and link to this page for more detailed security tips.


Detail Author:
- Name : Miss Jadyn Satterfield V
- Username : schiller.michelle
- Email : hokuneva@considine.com
- Birthdate : 1997-01-10
- Address : 752 Trantow Plain Suite 940 Olentown, IA 40624
- Phone : 518.242.3918
- Company : Baumbach, Thompson and Koelpin
- Job : Transformer Repairer
- Bio : Perspiciatis ut necessitatibus non alias reiciendis iure. Ut distinctio rerum voluptatibus optio quis quidem in. Dicta iste error dolorem repellendus enim perferendis quia exercitationem.
Socials
tiktok:
- url : https://tiktok.com/@sadie.medhurst
- username : sadie.medhurst
- bio : Iure assumenda molestiae voluptas libero et sunt est.
- followers : 3560
- following : 1920
instagram:
- url : https://instagram.com/sadiemedhurst
- username : sadiemedhurst
- bio : Et tenetur eum delectus quo. Est iusto earum ut sint quis. Sit porro et qui numquam odio et.
- followers : 6365
- following : 2982
facebook:
- url : https://facebook.com/sadie485
- username : sadie485
- bio : Quis fugiat rerum quam odit repellat. Ut mollitia aut odio.
- followers : 2056
- following : 2270
twitter:
- url : https://twitter.com/sadie716
- username : sadie716
- bio : Praesentium consequuntur dolorem et consequatur ut eius. Rem quia voluptatem voluptatem sint culpa.
- followers : 5560
- following : 2409
linkedin:
- url : https://linkedin.com/in/sadiemedhurst
- username : sadiemedhurst
- bio : Doloribus et dolores modi.
- followers : 4251
- following : 2287
